
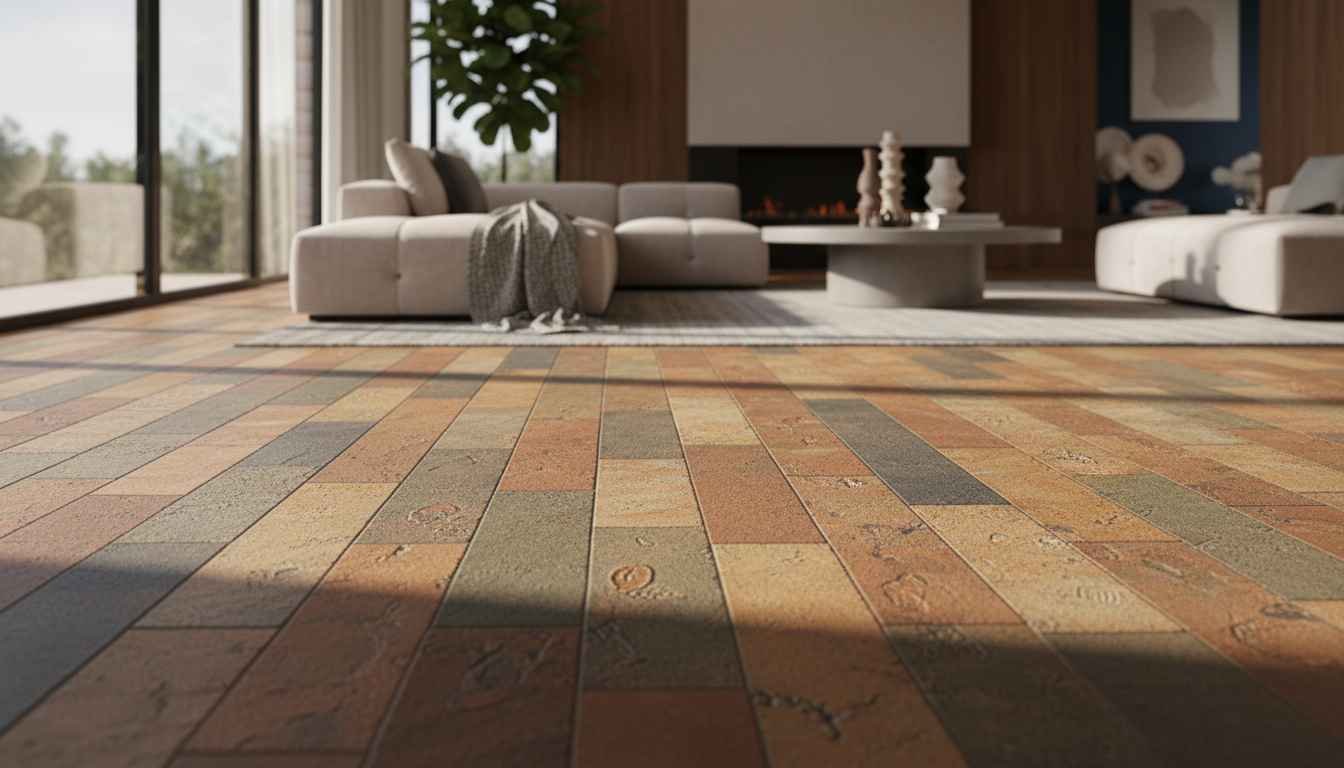
I was skeptical at first, but the moment I stepped onto my newly installed Asheville tile flooring, I understood why homeowners rave about it. The texture, durability, and subtle aesthetic balance transform a simple space into a striking environment. Unlike traditional hardwood or laminate, tile flooring in Asheville homes offers both longevity and easy maintenance, making it a practical yet stylish choice for any interior.
The appeal of Asheville tile flooring lies not just in its visual charm but in its adaptability. From rustic mountain cabins to sleek urban apartments, the right tile pattern can define a room. Ceramic, porcelain, and natural stone are the most popular options, each with its own benefits. Ceramic is budget-friendly and versatile, porcelain resists moisture and wear, and natural stone brings unique character and elegance. Understanding these differences is essential before beginning your installation journey.
Ingredients/Materials
For a standard 10×12 foot room, you will need:
Asheville-style ceramic or porcelain tiles – approximately 160–180 pieces (consider 10% extra for cuts and waste)
Thin-set mortar – 50 lbs bag (typically covers 50 sq ft per bag)
Tile spacers – 1/4 inch recommended, about 100 pieces
Grout – 25 lbs, select color matching your tiles
Notched trowel – 1/2 inch teeth
Tile cutter or wet saw
Rubber grout float
Level and measuring tape
Bucket and sponge for cleaning
Sealant for natural stone tiles (if applicable)
Step 1 – Preparing the Subfloor
Before laying a single tile, ensure your subfloor is clean, level, and structurally sound. Asheville homes, particularly older ones, often have uneven wooden subfloors. Sand down any high spots and fill gaps or cracks with patching compound. If installing over concrete, check for moisture and level inconsistencies. Proper subfloor preparation is the foundation of a flawless tile floor and reduces the risk of cracking or tile displacement over time.
Step 2 – Planning the Layout
Measure the room carefully and mark the center lines. This ensures your tiles are symmetrical and the cuts fall near walls, rather than in the middle of a room. Dry-lay a row of tiles along the center lines to visualize placement. Spacing is critical; even a few millimeters off can result in uneven grout lines. In Asheville homes with irregular dimensions, planning becomes an art, balancing aesthetics and practicality.
Step 3 – Applying Thin-Set Mortar
Mix the thin-set mortar according to the manufacturer’s instructions. Using a notched trowel, spread the mortar evenly over a small section of the subfloor. Apply at a consistent angle to create ridges that enhance adhesion. Only cover an area you can tile within 15–20 minutes to prevent drying before placement. A well-applied mortar layer ensures tiles remain level and secure for decades.
Step 4 – Laying the Tiles
Start at the intersection of your center lines and work outward. Press each tile firmly into the mortar, giving a slight twist to set it. Use tile spacers to maintain uniform gaps for grout. Check periodically with a level to keep the surface even. For intricate designs or patterned tiles, consider alternating colors or textures to add depth. Many homeowners find inspiration from local Asheville aesthetics, pairing earthy tones with geometric patterns.
Step 5 – Cutting Tiles
For edges and corners, measure the gap precisely and cut tiles using a tile cutter or wet saw. Take your time; precise cuts make the difference between a professional-looking floor and one that feels DIY. Keep extra tiles for future repairs – this is particularly important for specialty tiles sourced locally or from artisanal suppliers.
Step 6 – Grouting
Allow the tiles to set for at least 24 hours. Mix the grout and apply it with a rubber float, pressing firmly into the gaps. Work in small sections, wiping excess grout with a damp sponge before it dries. Grout not only completes the look but also protects the tiles from shifting and moisture infiltration. For high-traffic areas in Asheville homes, a darker grout can hide stains while highlighting tile texture.
Step 7 – Sealing (If Needed)
For natural stone tiles, apply a sealant once the grout has fully cured. This step prevents staining and enhances durability. Even for ceramic and porcelain, consider a light sealant for areas exposed to heavy wear or moisture. Sealing maintains the pristine look of your tile and simplifies routine cleaning.
Step 8 – Finishing Touches
Remove spacers and clean the floor thoroughly. Inspect edges and grout lines for imperfections. Add baseboards or quarter-round trim for a seamless transition between wall and floor. A well-executed finish elevates the entire space, making your Asheville tile flooring feel like a centerpiece rather than a functional necessity.
Why Asheville Tile Flooring Works
Tile flooring is more than just a visual choice; it offers practical advantages. It’s hypoallergenic, resists scratches, and is easy to maintain. For homes in the Asheville area, which can experience humidity and seasonal temperature swings, tile performs better than wood or carpet. Beyond practicality, the right tile can amplify natural light and create a cohesive design flow, especially when paired with complementary furnishings and decor. For those seeking inspiration, browsing curated home accents can help – Altus Fine Art provides pieces that harmonize beautifully with tile surfaces, integrating texture and color in subtle ways.
Potential Drawbacks
Despite its benefits, tile flooring isn’t for everyone. It can be cold underfoot, particularly in winter, unless paired with underfloor heating. Hard surfaces can be unforgiving if someone falls, making them less ideal for households with very young children. Installation is labor-intensive and requires precision; a poorly installed tile floor can lead to cracks and uneven surfaces. Lastly, the upfront cost – especially for high-end or artisanal tiles – may be higher than alternatives, though the longevity often justifies the investment.
Maintenance Tips
Clean regularly with a neutral pH cleaner to avoid damaging the tile or grout. Wipe up spills promptly, particularly on natural stone tiles, to prevent staining. Re-seal stone tiles every few years, and check grout lines for cracks or discoloration. These small habits ensure your Asheville tile flooring remains a long-term asset rather than a short-term fix.
Conclusion
Asheville tile flooring combines elegance, durability, and adaptability. With careful planning, precise installation, and proper maintenance, it can transform any space into a modern, minimalistic haven. While the process requires patience and attention to detail, the outcome is a floor that is both functional and visually compelling, capable of elevating your home’s overall aesthetic for decades to come.
